Wednesday, March 26, 2025

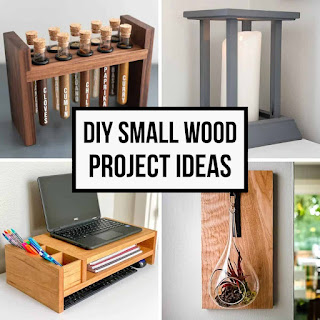
Easy small woodworking project tutorials

Jump into Woodworking: Easy Projects for Beginners

So, you've got the woodworking bug? Awesome! It's a fantastic hobby, incredibly rewarding, and way more accessible than you might think. Forget those intimidating projects you see online – we're starting small, simple, and super satisfying. This guide is packed with easy woodworking project tutorials perfect for newbies. Grab your tools, let's get started!

Project 1: The Classic Coasters

This is the perfect "first project" – quick, easy, and lets you practice some fundamental skills. We'll be making a set of four simple coasters.
What You'll Need:

  • Four pieces of wood (about 4" x 4" square – hardwood like maple or cherry looks great, but pine works too!)
  • Sandpaper (various grits, starting around 100 and going up to 220)
  • Wood glue
  • Felt pads (or cork, for the bottom)
  • Wood finish (polyurethane is a good all-around choice)
  • Measuring tape/ruler
  • Pencil
  • Safety glasses

Let's Build!

First, sand your wood pieces. Start with the coarser grit sandpaper and work your way up to the finer grit. You want smooth, even surfaces. This step is crucial – a good sanding job makes a world of difference. Don't rush this part! Trust me.

Next, if you want a more interesting look, consider adding a small decorative element. You could burn a simple design, paint a border, or even inlay small pieces of contrasting wood. This is totally optional, though! Keep it simple for your first time.

Once you're happy with the look, apply a couple of coats of your chosen wood finish. Let each coat dry completely before applying the next. Follow the instructions on your finish – some need longer drying times than others. This protects your coasters and gives them a nice sheen.

Finally, attach the felt or cork pads to the bottom of each coaster. This will protect your furniture. A tiny dab of wood glue works perfectly. Let it dry completely, and you're done! You've made your very first woodworking project.

Project 2: A Simple Shelf

Level up your skills with a small, floating shelf! This project introduces you to cutting wood at angles and using screws.

What You'll Need:

  • Two pieces of wood for the shelf supports (approx. 8" long, depending on desired shelf length)
  • One piece of wood for the shelf (length to your preference, depth about 6 inches)
  • Wood screws (appropriate size for your wood thickness)
  • Screwdriver
  • Drill (with a drill bit slightly smaller than your screws)
  • Level
  • Pencil
  • Measuring tape/ruler
  • Sandpaper
  • Wood finish (optional)

Building the Shelf: A Step-by-Step Guide

First, cut your wood to size. If you're not comfortable using a saw yet, many hardware stores will cut wood for you – just bring your measurements! Sand all the pieces smoothly.

Next, decide where you want your shelf to go and mark the location on the wall. Use a level to make sure your markings are perfectly horizontal. This is important for a shelf that doesn't look wonky.

Now, attach the shelf supports to the wall. Use appropriate wall anchors based on your wall type (drywall, plaster, etc.). You'll pre-drill pilot holes to prevent the wood from splitting when screwing into it. Refer to the instructions that came with your wall anchors.

Finally, place the shelf on top of the supports and secure it with screws from the bottom. Make sure you don't over-tighten the screws, or you might damage the wood.

Once you're satisfied, you can apply a wood finish, but this is entirely optional.

Project 3: A Tiny Wooden Box

This project introduces you to joinery – connecting pieces of wood together in a more sophisticated way. We'll use simple butt joints, but you can explore other joints as you become more experienced.

Materials You Need:

  • Small pieces of wood (enough for the box's sides, bottom, and top – consider using leftover pieces from your other projects!)
  • Wood glue
  • Clamps (helpful but not essential)
  • Sandpaper
  • Wood finish (optional)
  • Small hinges (for the lid)

Building Your Little Box

Cut your wood to size, ensuring all sides are accurately measured for a nice, square box. Sand all the pieces very well.

Assemble the box using wood glue. Apply glue to the edges you'll be joining. For a stronger joint, consider using small finishing nails or brads, but this isn't strictly necessary for a tiny box.

Use clamps to hold the pieces together while the glue dries. This is a great opportunity to practice your clamping skills, though you can also achieve a reasonable result just by letting the glue set.

Once the glue is dry, carefully sand any excess glue or rough edges. Attach the hinges to the top and bottom using small screws. You can decorate your box any way you like! A simple wood stain or a bit of paint can create a striking finished look.

Commonly Asked Questions

Q: What kind of wood should I use for these projects?

A: Pine is a great and inexpensive choice for beginners. Hardwoods like maple or cherry are more durable and look more polished but can be more expensive and challenging to work with.

Q: What tools do I absolutely need to start?

A: A measuring tape, pencil, sandpaper, and a good saw (hand saw or a jigsaw) are essential. Clamps are incredibly helpful but not completely necessary, especially for the smaller projects.

Q: Where can I learn more advanced woodworking techniques?

A: There are tons of fantastic resources online! YouTube is a treasure trove of woodworking tutorials, from beginner to expert level. Websites and books dedicated to woodworking are also great options. Consider joining a local woodworking club or taking a class.

Q: What's the best way to protect my finished projects?

A: A good quality wood finish (like polyurethane) is crucial for protecting your projects from scratches, moisture, and wear. Always follow the manufacturer's instructions carefully.

Q: Is woodworking dangerous?

A: Like any hobby involving tools, woodworking does have inherent risks. Always wear safety glasses and use caution when operating any power tools. Start with simple projects and gradually build your skills and confidence.

Remember, woodworking is all about learning and having fun. Don't be afraid to experiment, make mistakes, and learn from them! The most important thing is to enjoy the process.

Continue reading

How to Build a Wood Pallet Daybed: Easy DIY Tutorial

How to Build a Wood Pallet Daybed: An Easy DIY Tutorial

Hey everyone! So, you're thinking about building your own daybed from reclaimed wood pallets? Awesome! That's a fantastic project, and I'm here to walk you through it step-by-step. This tutorial is designed for beginners, so don't worry if you've never wielded a hammer before (though a little DIY experience never hurts!). We'll be making a super comfy and stylish daybed, perfect for lounging, reading, or even just chilling out with a cup of tea. Let's get started!

Gathering Your Supplies: What You'll Need

Before we dive into the construction, let's make sure you have everything you need. Running to the hardware store mid-project is, let's just say, less than ideal. Trust me on this one!

The Essential Pallet Parts

This is the star of the show! You'll need two sturdy wood pallets. Ideally, they should be the same size and in relatively good condition. Check them carefully for any loose boards or significant damage. If you find any wobbly bits, you might need extra screws to reinforce them. You can often find free or inexpensive pallets on Craigslist, Facebook Marketplace, or even behind local businesses (always ask permission first!).

Tools of the Trade

  • Hammer: A good, sturdy claw hammer will be your best friend.
  • Screwdriver (or Drill): A cordless drill will make things go much faster, but a screwdriver will work if that's all you have.
  • Screws: You'll need plenty of exterior-grade wood screws, at least 2-3 inches long. The length depends on the thickness of your pallet boards.
  • Measuring Tape: Accuracy is key, especially when working with wood. Grab a reliable measuring tape.
  • Level: To ensure your daybed is nice and stable. A small, handy level is perfect.
  • Safety Glasses: Protect your eyes from flying debris – always a good habit!
  • Work Gloves: Protect your hands from splinters and rough wood.
  • Saw (optional): If you need to trim down any pallet boards, a handsaw or circular saw will do the trick. Alternatively, you may choose to just remove boards if it's not structural.
  • Sandpaper (optional): To smooth out any rough edges or splinters on the pallets.
  • Wood Stain or Paint (optional): To give your daybed a personal touch and protect the wood.
  • Mattress or Cushions: The comfy part! Choose a mattress or cushions that fit your pallets.

Building Your Pallet Daybed: A Step-by-Step Guide

Okay, let's get down to business! This is where the fun begins. Follow these steps carefully, and you'll have your beautiful daybed ready in no time.

Step 1: Preparing the Pallets

Inspect your pallets for any loose boards, nails, or staples. Remove any that are loose or pose a safety hazard. If you want to, now's the time to sand down the wood to smooth out any rough edges. This step is optional, but it will make your daybed more comfortable.

Step 2: Assembling the Base

Lay your two pallets side-by-side, ensuring they are flush and level. You can use your level to double-check this. Once satisfied, use screws to fasten the two pallets together. Drive screws through the sides, connecting the two pallets as one piece. Make sure you are driving the screws straight so you don't split the wood.

Step 3: Adding Stability (Optional)

For extra stability, you can consider adding support beams underneath the daybed. Measure the width of your pallets and cut some 2x4s or similar lumber to the appropriate length. Attach these beams securely to the underside of the pallets using screws. This step prevents the structure from sagging and increases durability.

Step 4: Finishing Touches

Time to add the finishing touches! If you chose to paint or stain your daybed, now is the time to apply it. Let it dry completely before moving on. You can also consider adding some decorative elements like small shelves, or maybe even adding wheels to the base for easy mobility.

Step 5: Adding Cushions

Now for the best part! Place your mattress or cushions on top of the pallet daybed. You can use regular foam mattress pads or create custom-sized cushions for a more finished look. You can even add a throw blanket for extra cozy vibes.

Commonly Asked Questions (FAQs)

Let's tackle some common questions you might have about this project.

Q: Are all pallets safe to use?

A: Not necessarily. Some pallets are treated with chemicals, which might not be safe for indoor use. Look for heat-treated pallets (marked with HT) or those with an IPPC stamp. Avoid pallets that are visibly moldy or show signs of significant damage.

Q: How much does this project cost?

A: The cost varies greatly depending on whether you find free pallets, and the finishing materials you choose. The basic materials (screws, etc.) will likely cost between $10 - $30, plus any costs for cushions or a mattress.

Q: Can I make this daybed bigger or smaller?

A: Absolutely! You can use more or fewer pallets depending on the size you want. You can also modify the overall design to fit your needs and space.

Q: What if my pallets aren't perfectly the same size?

A: That's okay! You can use a saw to trim down any extra pieces or use shims to level out the pallets. Don't be afraid to get creative to fix any minor discrepancies.

Q: How long does it take to build this daybed?

A: The actual construction time depends on your experience level and how much preparation you do. A beginner might spend a few hours, while someone more experienced might be finished in under two. Remember to take your time and prioritize safety.

I hope this tutorial helped you build your awesome pallet daybed! Remember to always prioritize safety, and have fun with the project. If you have any other questions, feel free to ask! Happy building!

Continue reading

Free woodworking plans for ergonomic and adjustable desks

Free Woodworking Plans for Ergonomic and Adjustable Desks: A Comprehensive Guide

The modern workspace demands adaptability and ergonomic considerations to promote well-being and productivity. A custom-built, adjustable desk offers a superior solution, allowing for personalized adjustments to height, posture, and workspace organization. This guide provides a detailed exploration of available free woodworking plans for creating your own ergonomic and adjustable desk, covering various design approaches and crucial construction considerations.

Understanding Ergonomic Principles in Desk Design

Before delving into specific plans, it's crucial to grasp the fundamental ergonomic principles that guide the design of an effective and health-conscious workstation. These principles aim to minimize strain and discomfort during prolonged periods of sitting or standing.

Posture and Height Adjustability:

Height adjustability is paramount. The desk should allow the user to alternate between sitting and standing, accommodating individual heights and preferences. The optimal sitting height ensures that your elbows are at a 90-degree angle when typing, and your feet are flat on the floor. Standing height should allow for a comfortable posture, with minimal strain on the back and neck.

Keyboard and Monitor Placement:

The keyboard and monitor should be positioned to minimize neck and shoulder strain. The monitor's top should be at or slightly below eye level, preventing the user from looking down continuously. The keyboard should be close enough to avoid reaching, promoting a neutral wrist position.

Workspace Organization:

Effective organization reduces unnecessary reaching and stretching. Drawers, shelves, and cable management systems help to keep the workspace tidy and accessible. Consider incorporating specific storage solutions for frequently used items to improve workflow efficiency.

Exploring Free Woodworking Plans: A Variety of Options

Numerous free woodworking plans are available online, each offering a unique approach to designing and building an adjustable desk. The complexity of these plans varies widely, from relatively simple designs to more intricate projects requiring advanced woodworking skills. Careful consideration of your skill level and available tools is crucial in selecting the appropriate plan.

Simple Standing Desk Plans:

These plans typically focus on creating a fixed-height standing desk, often utilizing readily available materials like inexpensive lumber. They are ideal for beginners and provide a foundation for more advanced projects. The simplicity of design allows for quicker construction and may require fewer specialized tools.

  • Look for plans that clearly outline the cutting list, assembly instructions, and necessary hardware.
  • Prioritize plans with detailed diagrams and illustrations for easier comprehension.
  • Consider the overall sturdiness and stability of the design, as a stable work surface is paramount.

Electrically Adjustable Desk Plans:

These more complex plans involve incorporating an electric linear actuator system, allowing for seamless height adjustment with the push of a button. While these plans present a greater challenge, the resulting functionality and convenience are significant. The integration of electric components adds complexity to the project, requiring familiarity with electrical wiring and connections.

  • Thoroughly research the specifications and capabilities of electric linear actuators before selecting a plan.
  • Ensure the chosen plan provides detailed instructions on wiring and safety precautions.
  • Consider the weight capacity of the actuator system in relation to the anticipated load of the desktop.

Manual Crank Adjustable Desk Plans:

Offering a middle ground between simple standing desks and electrically adjustable ones, manual crank systems provide a cost-effective and reliable method of height adjustment. These plans usually involve a hand crank mechanism connected to a threaded rod, allowing for smooth and controlled height alterations. This approach avoids the complexities of electrical wiring but requires manual effort for adjustments.

  • Examine the smoothness and ease of operation of the crank mechanism described in the plan.
  • Assess the stability and sturdiness of the entire structure, as it will bear the weight of the desktop and user's equipment.
  • Consider the overall aesthetics of the crank system's integration into the desk design.

Essential Considerations for Building Your Desk

Regardless of the chosen plan, several crucial factors must be considered throughout the construction process.

Material Selection:

Lumber choice significantly impacts the desk's durability and aesthetics. Hardwoods like maple, oak, or cherry offer superior strength and longevity, but they may be more expensive. Softwoods like pine or fir are more affordable but may require additional reinforcement.

Tool Requirements:

Proper tools are essential for accurate cuts and assembly. A circular saw, miter saw, drill, and various woodworking clamps are typically required. The specific tool list will depend on the complexity of the chosen plan.

Safety Precautions:

Safety should be paramount throughout the construction process. Always wear appropriate safety gear, including eye protection, ear protection, and dust masks. Use caution when operating power tools and follow the manufacturer's safety guidelines.

Finishing Touches:

Finishing enhances the desk's appearance and protects it from damage. Sanding the wood to a smooth finish before applying a stain, paint, or sealant is recommended. Choose a finish that is durable and suitable for the chosen wood type.

Conclusion: Crafting Your Ideal Ergonomic Workspace

Building a custom ergonomic and adjustable desk is a rewarding project that allows for personalized design and functionality. By carefully researching free woodworking plans, understanding ergonomic principles, and diligently following safety precautions, you can create a workspace that promotes health, comfort, and productivity. Remember to select a plan that aligns with your skill level and available resources, and enjoy the process of transforming your workspace into a truly personalized and efficient environment.

Continue reading

Creative Plywood Furniture Plans for Stylish Pieces

Unleash Your Inner Designer: Creative Plywood Furniture Plans for Stylish Pieces

Plywood. The word itself might conjure images of utilitarian shelving units or bland, mass-produced furniture. But think again! With a little creativity and the right plans, plywood transforms into a canvas for stunning, bespoke pieces that will elevate your home's style. This isn't your grandma's plywood; we're talking sleek, modern designs, intricate curves, and finishes that rival high-end materials. Prepare to be inspired as we explore the exciting possibilities of plywood furniture making.

Modern Minimalist Marvels

Embrace the beauty of simplicity with minimalist designs that showcase plywood's inherent elegance. Think clean lines, geometric shapes, and a focus on functionality. The natural grain of the plywood becomes a key design element, adding warmth and texture to otherwise austere forms. A simple, low-profile coffee table constructed from several large plywood sheets, joined with carefully placed dowels and finished with a natural oil, exudes understated sophistication. Similarly, a floating shelf system, strategically placed against a wall, utilizes the plywood's strength and light weight to create a practical and visually appealing storage solution. The key is to let the material speak for itself, avoiding unnecessary embellishments.

Coffee Table Construction Guide

For building a minimalist coffee table, start with two large plywood sheets for the top and bottom. Cut and sand all edges carefully. Use strong wood glue and dowels to securely join the sheets. Consider adding simple, tapered legs made from the same plywood for a cohesive look. Finish the entire piece with a clear sealant or a light-colored oil to highlight the wood's natural beauty. Remember to accurately measure and plan your cuts to ensure a stable and aesthetically pleasing structure.

Mid-Century Modern Magic

Channel the iconic designs of the mid-century modern era with curved edges, tapered legs, and a playful use of negative space. Plywood's ability to be bent and shaped (with the right techniques, like steam bending) allows you to create stylish pieces with a vintage flair. Imagine a graceful, curved-back chair, its plywood frame carefully shaped and finished in a vibrant color, or a bookshelf with subtly angled shelves, drawing the eye with its dynamic form. This style celebrates craftsmanship and the organic flow of form and function.

Essential Tools for Mid-Century Projects

To tackle more ambitious mid-century modern projects, you'll need specialized tools such as a steam box for bending plywood, and perhaps a router for creating precise curves and decorative edges. Invest in good quality clamps to hold the plywood during the bending and gluing process. Accurate measuring and careful planning remain essential for achieving the desired shape and stability. Don't underestimate the power of sanding to achieve a smooth, professional finish.

Rustic Charm and Industrial Chic

Plywood readily lends itself to both rustic and industrial aesthetics. For a rustic look, consider employing a distressed finish, emphasizing the wood's natural imperfections. A simple, chunky side table with exposed edges and a slightly uneven surface can add a charming, handcrafted feel to a room. Alternatively, for an industrial design, embrace a more raw, unfinished look. A metal-legged table paired with a large, unadorned plywood tabletop creates a striking contrast, highlighting the material's inherent strength.

Finishing Touches for Different Styles

  • Rustic: Use a stain or paint with a distressed finish, applying multiple layers and sanding back in places for a weathered look.
  • Industrial: Leave the plywood raw or apply a clear sealant to protect it, leaving the natural grain and any minor imperfections visible.
  • Modern Minimalist: Use a clear sealant or a natural oil to highlight the wood's natural beauty.
  • Mid-Century Modern: Choose a vibrant paint color or a high-quality stain that complements the curves and lines of the design.
  • Plywood offers limitless possibilities. With careful planning, the right tools, and a dash of creativity, you can craft unique and stylish furniture pieces that reflect your personal taste and add character to your living space. So, grab your tools, gather your plywood, and start building your dream furniture!

    Continue reading

    Step-by-Step Guide to Crafting a Custom Cutting Board with Inlays and Personalization

    Crafting a Bespoke Cutting Board: A Comprehensive Guide to Inlay and Personalization

    The creation of a custom cutting board transcends mere functionality; it becomes an expression of artistry and personal style. This comprehensive guide will lead you through the meticulous process of designing and crafting a personalized cutting board, incorporating intricate inlays and bespoke details. From material selection to final finishing, each step is detailed to ensure a high-quality, enduring result.

    I. Conceptualization and Design

    A. Material Selection: The Foundation of Excellence

    The choice of wood significantly impacts the cutting board's aesthetics, durability, and overall performance. Hardwoods like maple, cherry, walnut, and oak are preferred for their density and resistance to wear. Maple offers a clean, bright surface, while cherry boasts rich reddish-brown tones that deepen with age. Walnut provides elegant, dark streaks, and oak presents a robust, textured grain. Consider the following factors when selecting your wood:

    • Hardness: Janka hardness ratings provide a quantitative measure of wood's resistance to dents and scratches. A higher Janka rating is desirable for cutting boards.
    • Grain Pattern: Straight grain is generally easier to work with and provides a more uniform appearance. However, interesting grain patterns can add character and visual interest.
    • Color and Texture: Choose a wood that complements your design aesthetic and personal preferences.
    • Availability and Cost: Factor in the accessibility and cost of the chosen wood species.

    B. Inlay Design: Embellishing Functionality

    Inlays offer an opportunity to elevate your cutting board from a utilitarian object to a work of art. Consider using contrasting wood species to create striking visual effects. Geometric patterns, floral motifs, or even personalized initials can be incorporated. Sketch your design on paper, paying close attention to the proportions and placement of the inlays. Precision is paramount in this stage, as it directly impacts the final result.

    • Pattern Selection: Choose a pattern that complements the overall aesthetic of the cutting board and the chosen wood species. Simple, geometric patterns are often easier for beginners.
    • Inlay Material: Explore a variety of wood species, contrasting colors, or even non-wood materials such as resin or metal for your inlay.
    • Scale and Proportion: Ensure that your inlay design is appropriately scaled for the size of the cutting board. Overly complex patterns can be challenging to execute.

    C. Personalization: Adding a Unique Touch

    Personalization is what truly sets your custom cutting board apart. This could involve incorporating initials, a family name, a significant date, or a short, meaningful inscription. Consider the font style and its placement on the board. A subtle, understated approach is often preferred, allowing the natural beauty of the wood to shine through.

    II. Construction and Assembly

    A. Preparing the Wood: Precision is Key

    Once you've selected your wood and finalized your design, carefully mill the wood to the desired dimensions. Use a planer to achieve a smooth, even surface and a thickness appropriate for your design. The precision of this stage is crucial to ensure a flawless finished product. Any imperfections will be amplified in the final piece. Pay close attention to squareness and parallelism.

    • Jointing: Use a jointer to ensure that one face of each board is perfectly flat and straight.
    • Planing: Planing will ensure both faces are parallel and the desired thickness is achieved.
    • Thicknessing: If necessary, use a thickness planer to ensure that all pieces are the same thickness.

    B. Creating the Inlays: Meticulous Workmanship

    Prepare the inlay pieces by cutting them to the precise dimensions dictated by your design. Use a sharp chisel or router with appropriate bits to create clean, crisp cuts. Ensure that the inlay pieces fit snugly into their designated slots, as this will prevent gaps and improve the overall appearance. Consider using a fine-tooth saw for intricate shapes.

    • Cutting Techniques: Explore different cutting methods such as using a jigsaw, bandsaw, or scroll saw depending on the complexity of your inlay design.
    • Test Fitting: Dry-fit the inlay pieces before gluing to ensure a proper fit.
    • Cleanliness: Maintain meticulous cleanliness throughout the inlay process to prevent dust and debris from compromising the final result.

    C. Assembly and Bonding: A Secure Union

    Apply a high-quality wood glue to the inlay pieces and carefully position them in their respective slots. Use clamps to ensure a secure bond and allow sufficient drying time as specified by the manufacturer. Any glue squeeze-out should be carefully cleaned immediately to prevent staining.

    • Glue Selection: Use a wood glue specifically designed for woodworking projects.
    • Clamping: Apply even pressure using clamps to ensure a strong bond.
    • Drying Time: Allow ample time for the glue to cure completely before proceeding to the next step.

    III. Finishing and Personalization

    A. Sanding: Achieving a Smooth Surface

    Once the glue is completely dry, sand the cutting board to achieve a smooth, even surface. Start with coarser grit sandpaper and gradually progress to finer grits. Pay close attention to the transitions between the wood and the inlays, ensuring a seamless finish. Sanding is crucial for creating a comfortable and functional cutting surface.

    • Sanding Sequence: Begin with a coarser grit (e.g., 80 grit) and progress to finer grits (e.g., 120, 180, 220 grit).
    • Sanding Direction: Sand in the direction of the wood grain to avoid scratches.
    • Edge Detailing: Pay particular attention to sanding the edges and corners to achieve a smooth, rounded finish.

    B. Applying the Finish: Protection and Enhancement

    Apply a food-safe finish to protect the cutting board from moisture and wear. Mineral oil, beeswax, or a food-safe cutting board oil are popular choices. Multiple coats may be necessary to achieve a durable, water-resistant surface. Follow the manufacturer's instructions carefully.

    • Finish Selection: Choose a food-safe finish that is compatible with your chosen wood species.
    • Application Technique: Apply thin, even coats, allowing each coat to dry completely before applying the next.
    • Drying Time: Allow sufficient time for the finish to cure completely before using the cutting board.

    C. Adding Personalization: The Final Touches

    After the finish has cured, you can add your personalized inscription. This can be done using a wood burning tool, a carving tool, or even a stencil and paint. Ensure that any personalization is done carefully and adds to the overall aesthetic rather than detracting from it.

    IV. Conclusion

    Crafting a custom cutting board with inlays and personalization is a rewarding project that combines artistry and craftsmanship. By meticulously following each step of this guide, you can create a beautiful and functional piece that will be cherished for years to come. Remember, patience and attention to detail are essential for achieving a high-quality, professional-looking result. This process allows you to create a unique heirloom, imbued with personal meaning and exceptional craftsmanship.

    Continue reading

    Easy-to-Follow Pergola Plans for Backyard Projects

    Easy-to-Follow Pergola Plans for Backyard Projects

    Constructing a pergola adds undeniable aesthetic appeal and functional shade to any backyard. This comprehensive guide provides detailed, easy-to-follow plans for various pergola designs, catering to different skill levels and backyard layouts. Whether you're a seasoned DIY enthusiast or a novice embarking on your first outdoor project, these plans offer a step-by-step approach to building your dream pergola.

    Planning Your Pergola Project

    Before diving into construction, meticulous planning is crucial for a successful outcome. This stage involves several key considerations:

    1. Determining Size and Location:

    Size: The pergola's dimensions should complement your backyard's size and the intended use. Consider the available space, the area you wish to shade, and the surrounding landscaping. A smaller pergola might suffice for a cozy seating area, while a larger structure is necessary for a more extensive patio or dining space. Accurate measurements are paramount.Location: Choose a location that maximizes shade and complements the existing landscape. Consider the sun's path throughout the day, ensuring adequate shade during peak sun hours. Avoid placing the pergola too close to trees or other structures that might hinder its construction or future maintenance. Ensure the chosen location allows for easy access to materials and tools during the building process. Access to water and electricity is also desirable depending on the nature of your construction.

    2. Choosing Materials:

    The choice of materials significantly impacts the pergola's aesthetics, durability, and cost. Popular options include:

    • Pressure-treated lumber: Offers excellent durability and resistance to rot and insects, making it a cost-effective choice.
    • Cedar: A naturally rot-resistant wood known for its attractive appearance and pleasant aroma. It requires less maintenance than pressure-treated lumber but is generally more expensive.
    • Redwood: Similar to cedar in terms of durability and aesthetics, redwood is also naturally resistant to insects and decay. It is a premium choice, known for its rich color and longevity.
    • Metal: Offers exceptional durability and low maintenance, but can be more challenging to work with and may require specialized tools.

    Consider the climate in your region when selecting materials. In areas with high humidity or rainfall, rot-resistant woods are essential. For regions with extreme temperature fluctuations, materials with high dimensional stability are recommended. Always purchase high-quality materials from reputable suppliers to ensure longevity and structural integrity.

    3. Obtaining Necessary Permits:

    Check with your local authorities to determine whether a building permit is required for your pergola project. Permits are necessary in many jurisdictions for structures exceeding a certain size or complexity. Obtaining the necessary permits before starting construction avoids potential delays and fines. Submit accurate plans and specifications with your application to expedite the approval process.

    Building Your Pergola: A Step-by-Step Guide

    The following steps outline the construction process for a standard 8ft x 10ft pergola. Adjust dimensions as needed to suit your specific design.

    1. Preparing the Foundation:

    A sturdy foundation is essential for a stable and long-lasting pergola. For this design, we recommend using 4x4 pressure-treated posts set in concrete footings. Dig four holes, approximately 24 inches deep and 12 inches wide, at each corner of the intended pergola location. Place the 4x4 posts in the holes, ensuring they are plumb and level. Fill the holes with concrete, allowing ample time for curing (at least 24 hours). Once the concrete has fully set, securely attach post base plates to the top of the posts using galvanized lag screws.

    2. Constructing the Frame:

    The frame forms the pergola's main structure. Using 2x6 pressure-treated lumber, construct two long beams (10ft) and two shorter beams (8ft), connecting them using galvanized screws and appropriate joinery techniques. Ensure the frame is square and level. Attach the frame to the posts using additional galvanized screws and metal brackets, creating a robust connection.

    3. Installing the Rafters:

    The rafters provide the shade and create the characteristic pergola design. Use 2x4 pressure-treated lumber for the rafters, spacing them evenly along the frame. Typically, spacing of 24" is common but this may be changed according to personal preference. Secure each rafter to the frame using galvanized screws. For added strength and stability consider using metal hangers designed to support pergola rafters.

    4. Adding Finishing Touches:

    Once the main structure is complete, add finishing touches to enhance the pergola's aesthetics and functionality. Consider adding decorative elements such as latticework, climbing plants, or outdoor lighting. Apply a sealant or stain to protect the wood from the elements and enhance its natural beauty. A stain will enhance the beauty of the wood and protect it from the elements while a sealant protects against moisture and UV rays.

    Advanced Pergola Designs

    Beyond the basic rectangular pergola, numerous design variations exist. Explore these options to tailor your pergola to your specific needs and preferences:

    1. Arched Pergolas:

    Arched pergolas offer a more elegant and sophisticated look. They require more intricate construction, often involving curved rafters and potentially pre-cut lumber, but the result is a visually striking structure. Careful planning and precise measurements are crucial for successful arch construction.

    2. Gable Pergolas:

    Gable pergolas feature a pitched roof, providing enhanced protection from rain and snow. This design requires additional framing to support the gable roof and careful consideration of water runoff.

    3. Pergolas with Attached Seating:

    Integrating seating directly into the pergola design creates a cohesive and functional outdoor space. This could involve built-in benches or a combination of seating and storage.

    Safety Considerations

    Throughout the construction process, prioritize safety. Wear appropriate safety gear, including safety glasses, gloves, and sturdy work boots. Use caution when working with power tools, ensuring they are properly maintained and operated according to the manufacturer's instructions. Securely support the structure during construction to prevent accidents. Always ensure the pergola is properly anchored to the ground to withstand strong winds or other weather events. Consult a structural engineer if you have doubts about your design or construction techniques, especially for more complex designs.

    Building a pergola is a rewarding project that enhances the beauty and functionality of your backyard. By carefully planning, following these instructions, and prioritizing safety, you can create a stunning addition to your outdoor living space that you'll enjoy for years to come.

    Continue reading

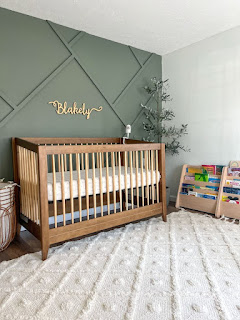
    Custom Baby Furniture Plans for Safe and Stylish Nursery Creations

    Custom Baby Furniture Plans for Safe and Stylish Nursery Creations

    The nursery, a sanctuary of dreams and first discoveries, deserves furniture that is as thoughtfully designed as it is aesthetically pleasing. While mass-produced cribs and changing tables offer convenience, crafting custom baby furniture provides an unparalleled opportunity to create a space that perfectly reflects your style and prioritizes the safety and well-being of your little one. This comprehensive guide explores the intricacies of designing and building custom baby furniture, emphasizing safety standards and creative design possibilities.

    Understanding Safety Regulations and Material Selection

    Before embarking on any custom furniture project, a thorough understanding of safety regulations is paramount. Failing to adhere to these standards can have severe consequences. The leading authority on baby furniture safety is the Consumer Product Safety Commission (CPSC) in the United States, and similar agencies exist in other countries. Their guidelines cover crucial aspects such as:

    Critical Safety Considerations

    • Crib Slats Spacing: Crib slats must be spaced no more than 2 3/8 inches apart to prevent a child from becoming trapped. This is a fundamental safety measure that should never be compromised.
    • Mattress Fit: The mattress should fit snugly within the crib frame, with no gaps exceeding two fingers' width. Loose-fitting mattresses pose a suffocation risk.
    • Corner Design: Sharp corners and edges should be avoided, opting for rounded or smoothly finished designs. This reduces the risk of injuries from bumps and falls.
    • Hardware Security: All screws, bolts, and other hardware must be securely fastened and inaccessible to the child. Consider using childproof fasteners where appropriate.
    • Lead and Toxic Substances: All materials used must be non-toxic and free from lead paint or other harmful substances. This is crucial for protecting the child's developing immune system.
    • Stability: The furniture must be robust and stable, capable of withstanding considerable weight and movement without tipping over. This is especially crucial for taller pieces like changing tables.

    Choosing Appropriate Materials

    The selection of materials significantly impacts both the safety and aesthetic appeal of your custom baby furniture. Popular and safe options include:

    • Solid Wood: Durable, aesthetically pleasing, and relatively easy to work with. Hardwoods like oak and maple are excellent choices, offering longevity and resistance to wear and tear.
    • Plywood: An affordable and strong alternative to solid wood, provided it is made with non-toxic glues and finishes. High-quality plywood provides excellent stability.
    • MDF (Medium-Density Fiberboard): While less robust than solid wood or plywood, MDF can be used effectively in combination with other materials or for decorative elements. Ensure it is treated with non-toxic finishes.
    • Finishes: Water-based, non-toxic paints and sealants are essential. Avoid oil-based paints, which contain volatile organic compounds (VOCs) that can be harmful to infants.

    Designing Your Custom Baby Furniture: From Concept to Blueprint

    The design process is where your creativity and functionality truly converge. Begin by considering the available space, your desired style, and the practical needs of the nursery. Will you need a changing table attached to the crib, or a separate unit? What storage solutions are necessary? A well-thought-out plan will prevent costly mistakes and ensure a seamless building process.

    Sketching and Conceptualization

    Start with sketches, exploring various layouts and designs. Consider incorporating specific elements that resonate with your aesthetic preferences, whether it's a minimalist Scandinavian style, a rustic farmhouse look, or a modern and contemporary design. Think about the overall color scheme and the integration of the furniture within the nursery's design.

    Detailed Plans and Measurements

    Once you have a solid concept, translate your sketches into detailed plans. Accurate measurements are critical. Consider using CAD software (Computer-Aided Design) to create precise blueprints, including detailed specifications for each component, joint types, and material dimensions. This will greatly simplify the construction process and minimize errors.

    Choosing the Right Tools and Equipment

    The tools required will depend on the complexity of your design and your woodworking experience. Essential tools may include a table saw, miter saw, planer, drill press, sander, and various hand tools. Ensure you have appropriate safety equipment, including eye protection, ear protection, and dust masks.

    Construction Techniques and Finishing Touches

    The construction process involves a series of carefully executed steps, starting with cutting the materials to the exact dimensions specified in your plans. Precise cuts are vital for ensuring the furniture's structural integrity and aesthetic appeal. Accurate joinery techniques, such as dowel joints, mortise and tenon joints, or pocket hole joinery, will guarantee a strong and lasting piece.

    Joinery and Assembly

    The choice of joinery depends on your skill level and the specific design. Dowel joints are relatively simple and provide adequate strength for many applications. More complex joints, such as mortise and tenon, offer superior strength and a more refined look. Pocket hole joinery is a time-saving method, especially for less visible joints. Careful assembly is key to ensuring structural integrity and preventing wobble or instability.

    Finishing and Safety Checks

    Once the furniture is assembled, the finishing process is crucial. This involves sanding to achieve a smooth surface, applying non-toxic paint or stain, and applying a clear coat for protection. Thorough sanding is essential to ensure a smooth and even finish. Finally, conduct a rigorous safety check to ensure all aspects of the furniture comply with the relevant safety regulations before introducing it to the nursery.

    Beyond the Basics: Advanced Customisation Options

    The possibilities for customization extend far beyond basic design elements. Consider incorporating unique details that reflect your personal style and add a touch of magic to the nursery. These enhancements can elevate the furniture from functional to truly bespoke.

    Incorporating Unique Design Elements

    Incorporate decorative elements such as hand-carved details, inlays, or custom hardware. These additions add personality and flair, transforming ordinary furniture into unique heirlooms. Consider using stencils or freehand painting to create whimsical designs that complement the nursery's theme.

    Built-in Storage Solutions

    Clever storage solutions can significantly enhance the functionality of the furniture. Consider integrating drawers, shelves, or cubbies into the design to store diapers, clothes, toys, and other baby essentials. This helps to keep the nursery organized and clutter-free.

    Sustainable and Eco-Friendly Choices

    Opt for sustainable materials like reclaimed wood or bamboo, reducing the environmental impact of your project. Choose non-toxic, low-VOC paints and finishes to minimize harm to your baby and the environment. This approach demonstrates a commitment to both safety and sustainability.

    Creating custom baby furniture is a rewarding endeavor that blends creativity, skill, and a deep commitment to your child's safety. By carefully following safety guidelines, selecting appropriate materials, and meticulously executing the design and construction process, you can craft a beautiful and safe haven for your little one, a space that will be cherished for years to come.

    Continue reading
     

    Hub Woodworking Copyright © 2016 | Powered by Blogger